You will need:
- Cardboard boxes
- Kitchen paper
- Brown crepe paper
- Masking tape
- Hot glue gun
- Flexible rat tube
- Toilet roll tubes
- Decomache or wrapping paper
- Penny coins
- Grout
- Wooden lolly sticks
- Modroc
Optional extras:
- Dollhouse lights
- Scraps of fabric/wadding
- Pine cones
- Watch/clock parts
- Matchsticks
- Balsa wood
- Tiny beads
- Cinnamon sticks
For the characters:
- Fimo
- Tiny glass eyes
- Small wooden dolls
- Dollshouse pans
Let's go!
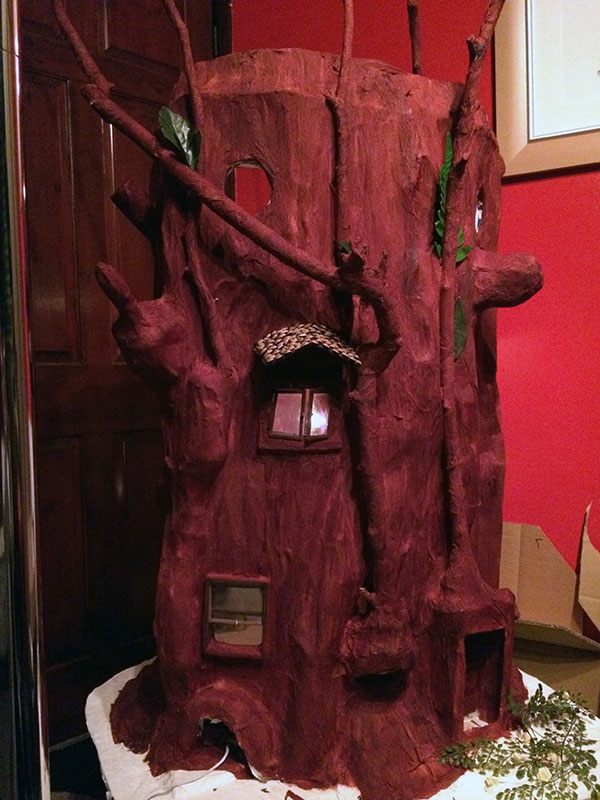
My big project for 2015 was to make The Magic Faraway Tree.
The books were always a childhood favourite of mine, so I was delighted when my nieces said they were reading the books at Christmas.
This was a lightbulb moment when I thought "wouldn't it be great to make a Faraway Tree along with all the characters." So my mind was made up in a split second!
My first thoughts were to make this out of some kind of barrel, but that proved trickier than I realised. The only barrels I could get were toughened plastic (which would not be easy to cut doors and windows out of). I then tried to find a large cardboard barrel, but couldn't find one. I asked my husband for help and he suggested some old speaker boxes that he had in the attic. OK they were not round, but with plenty of papier mache I convinced myself that these would be suitable. (I think my brain had already gone into overdrive of how I was going to make it, and was now itching to get started).
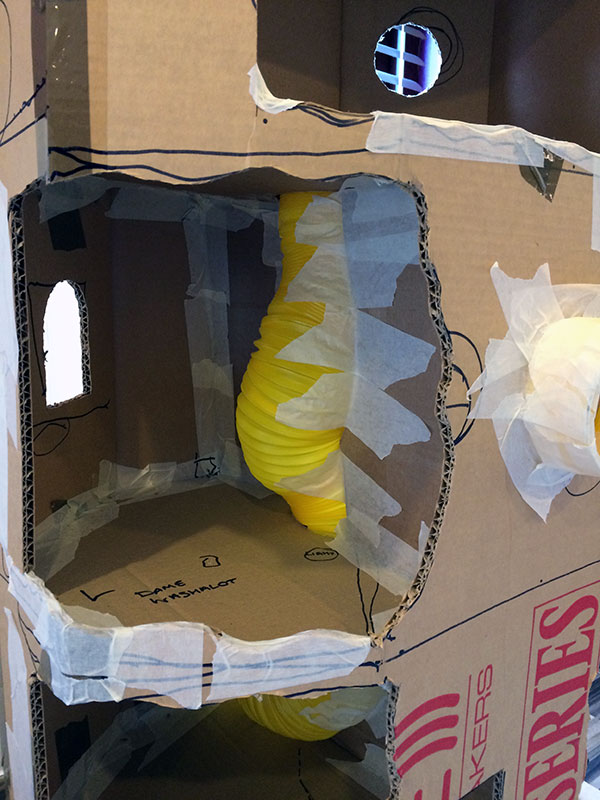
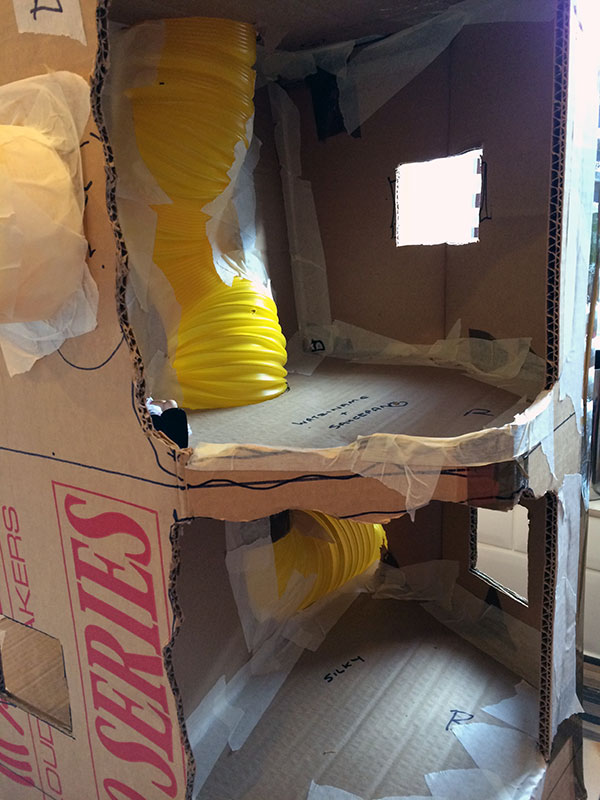
My first task was to work out what I was going to use for the Slippery Slope Slide that would run down the middle of the whole tree. I looked at tubes, pipes, guttering, and researched a whole manner of different objects. The problem that I would have is that none of them were flexible enough, or they were too narrow for a small doll to slide down. I finally settled on an extending tube that is made for hamsters or rats. This was bendy enough and wide enough for a doll. So with that worked out I started to assemble the house.
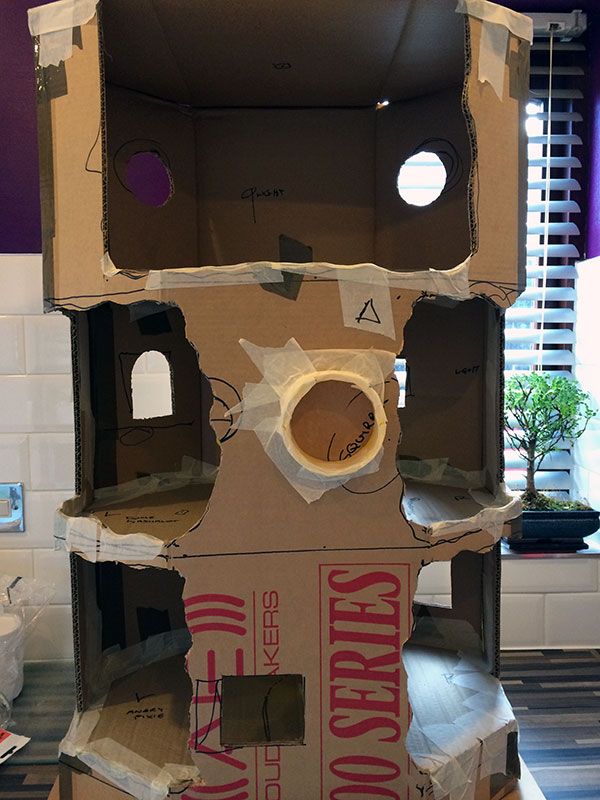
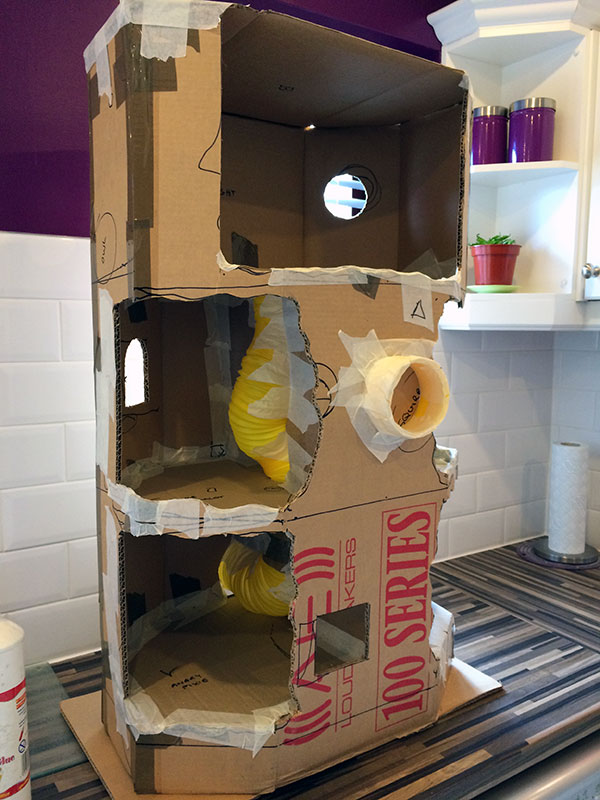
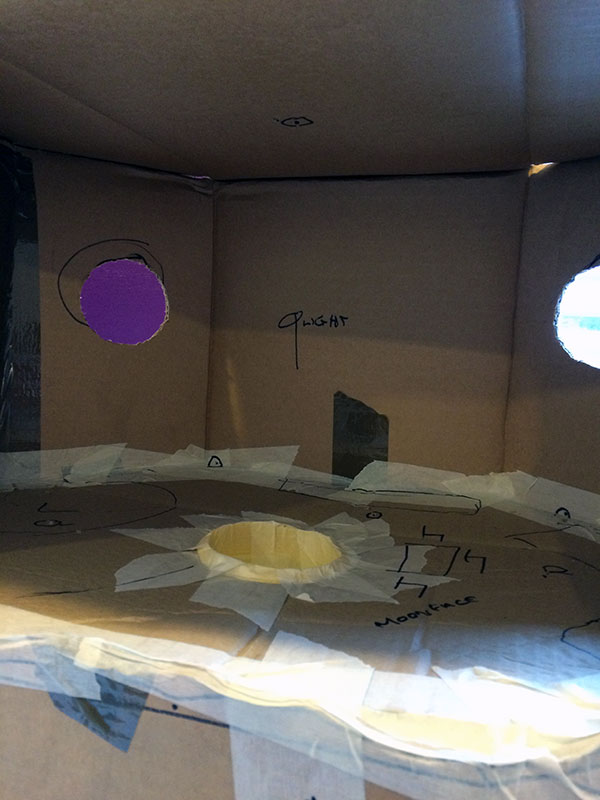
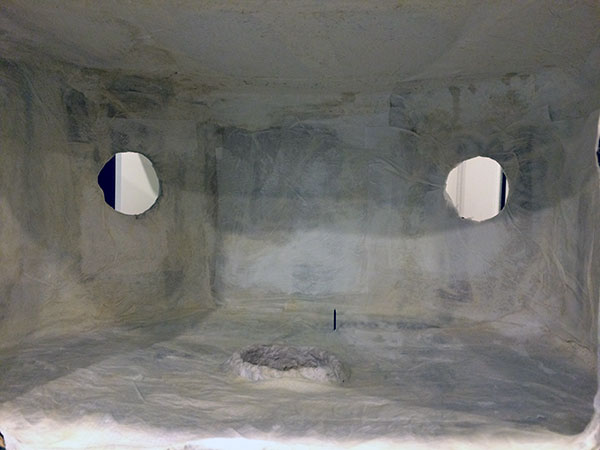
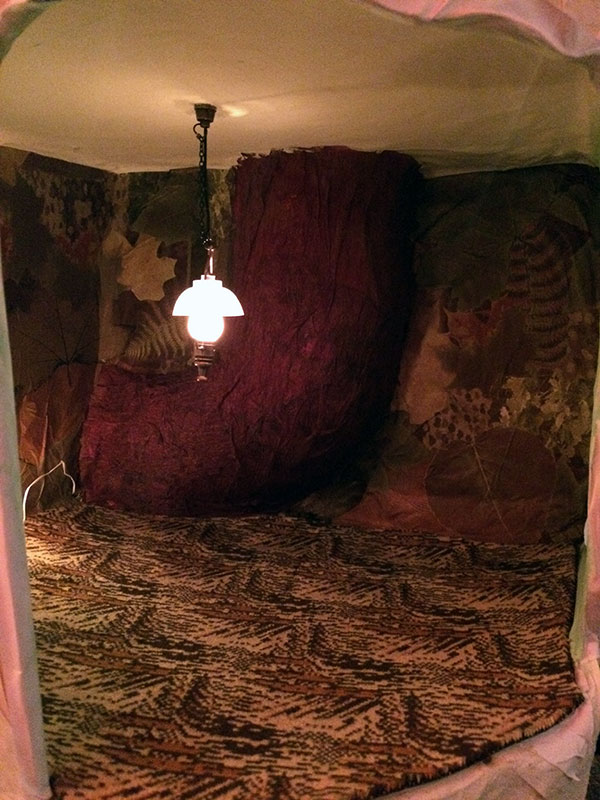
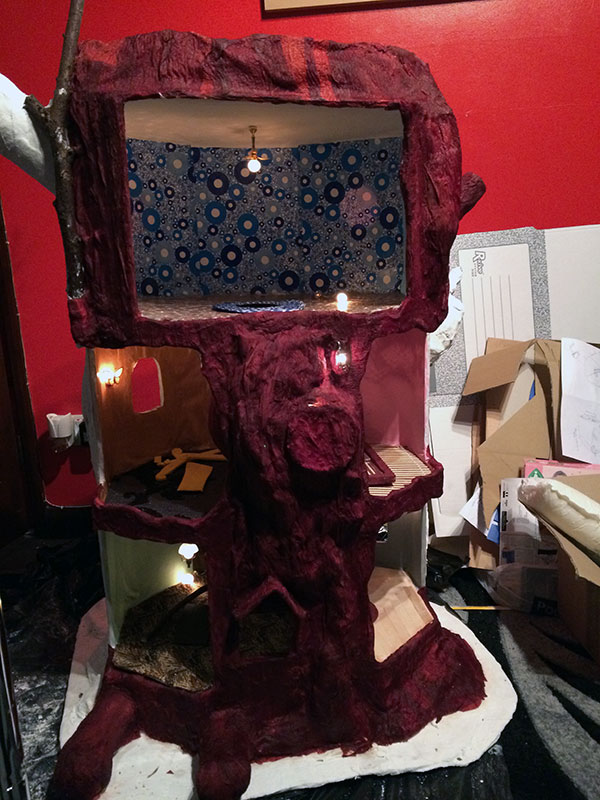
I worked out that the tree could only have five rooms. One for the Angry Pixie, one for Silky, one for Watzisname, one for Washalot and finally the top floor for Moonface. I made sure that the slippery slip went from top to bottom and came out at the back of the tree. I stuck the floors in using masking tape. I even decided to make the squirrel a small home on the front of the tree, which I also stuck in place.
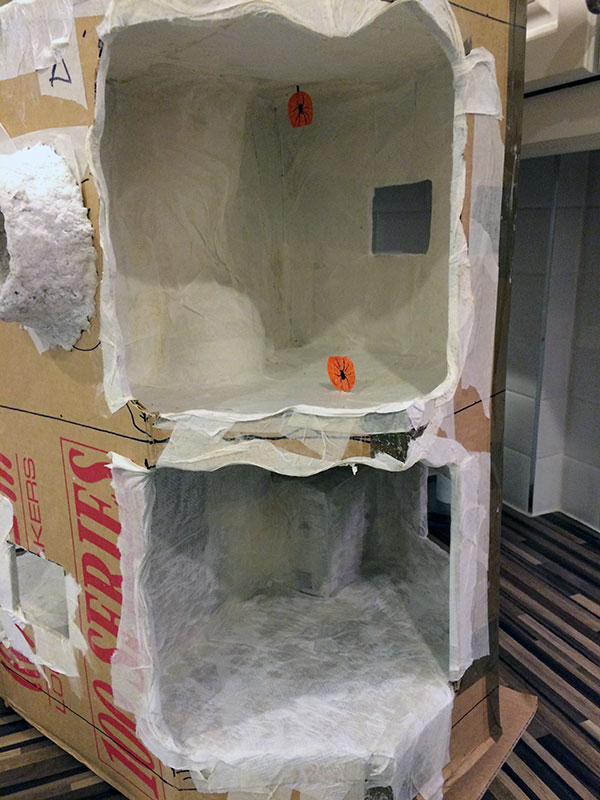
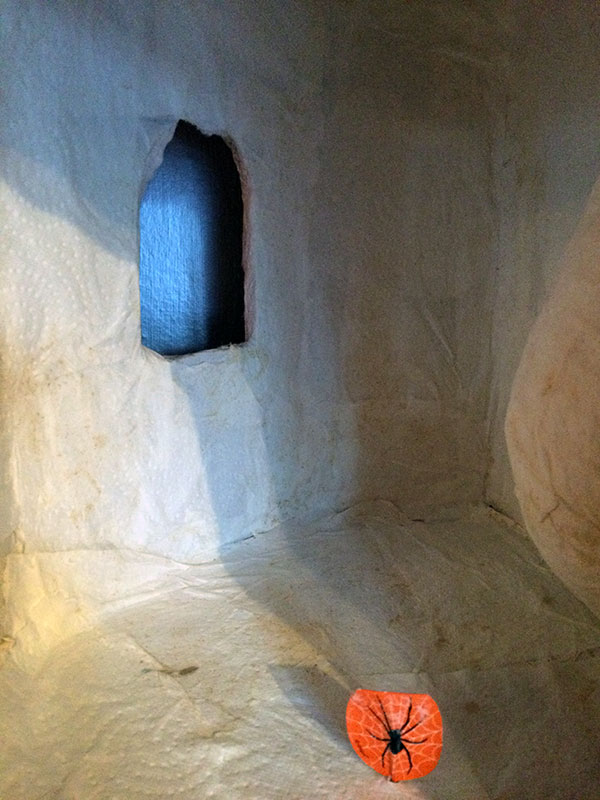
Once I was happy with the layout, I started to lay papier mache strips on the inside of the rooms. I knew that once the papier mache was dry it would give the tree some stability for me to continue. I put holes in the ceilings so that I knew where the lights would run (these are shown with some weird halloween spider cocktail stickers in the photographs).
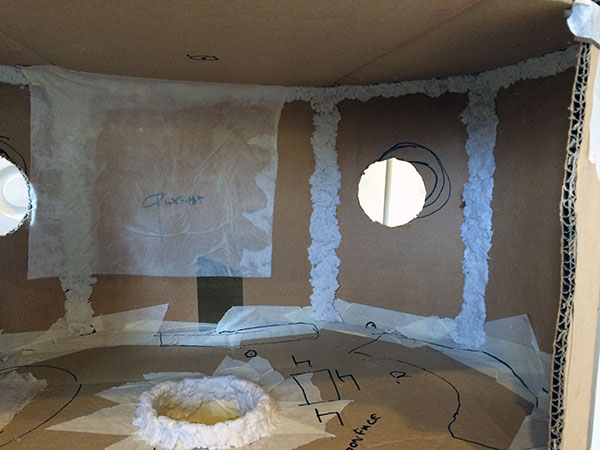
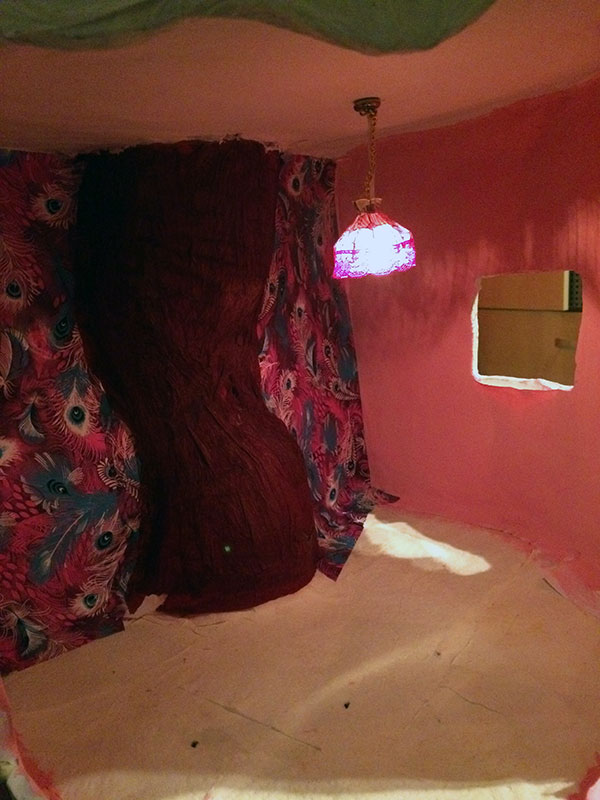
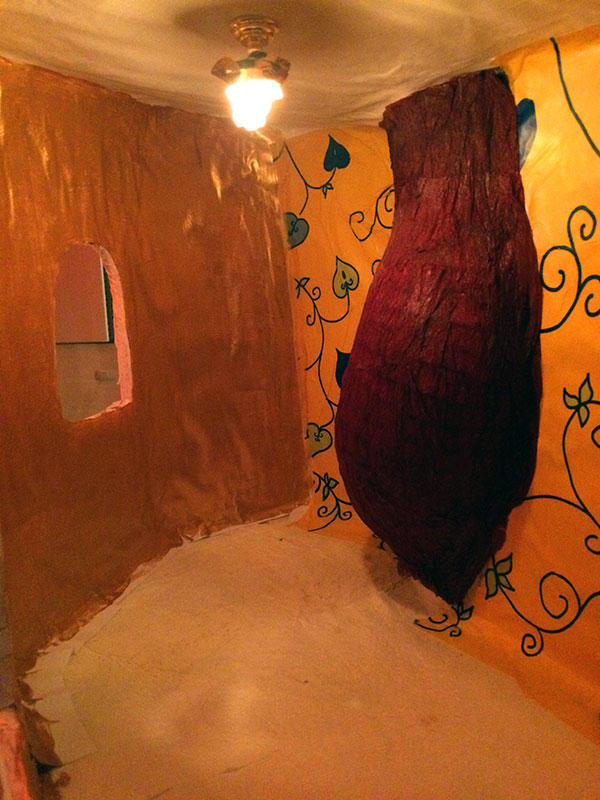
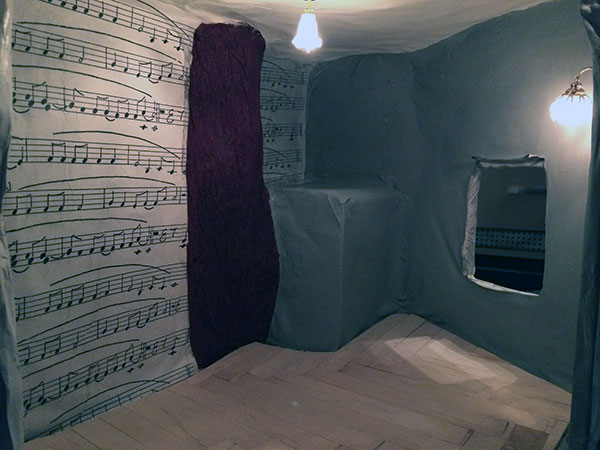
Once the papier mache had completely dried and hardened, the tree became a good solid object. I then started preparing the rooms. I painted each room a different colour and used Decomache for the wallpaper. I used brown crepe paper to cover over the slide in each room. I thought this gave a great effect and still looked as though a tree was running through.
I then started to attach the lights to each room. I needed to get all this completed and all the wiring in place to start on the outside of the tree.
By now I am thinking the tree is beginning to take over my life! I know that I am getting a little obsessed with it. From the moment I wake up till the time I go to bed, all I can think is how I will complete the next stage or how I can decorate and make furniture for each room. I was trying really hard not to rush anything (which is what I usually do).
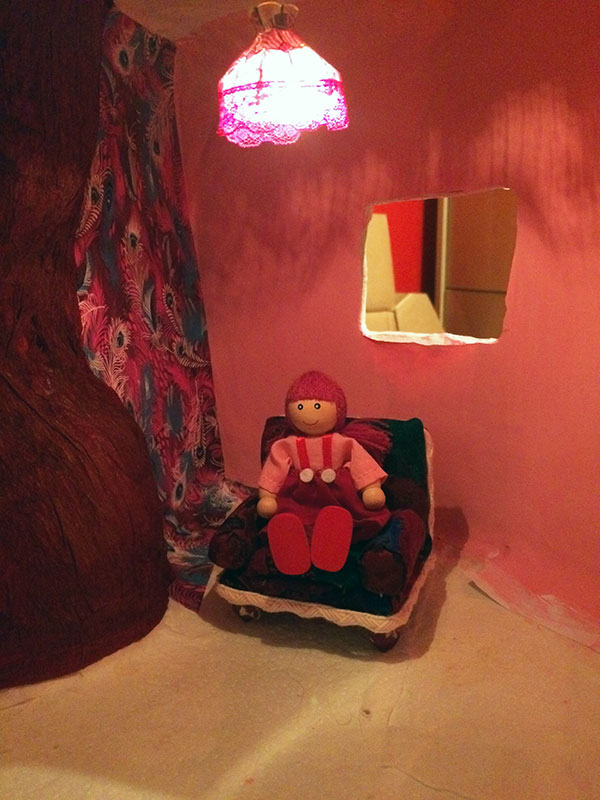
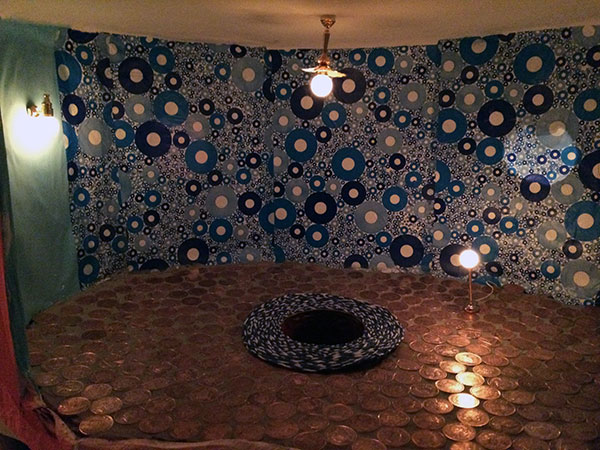
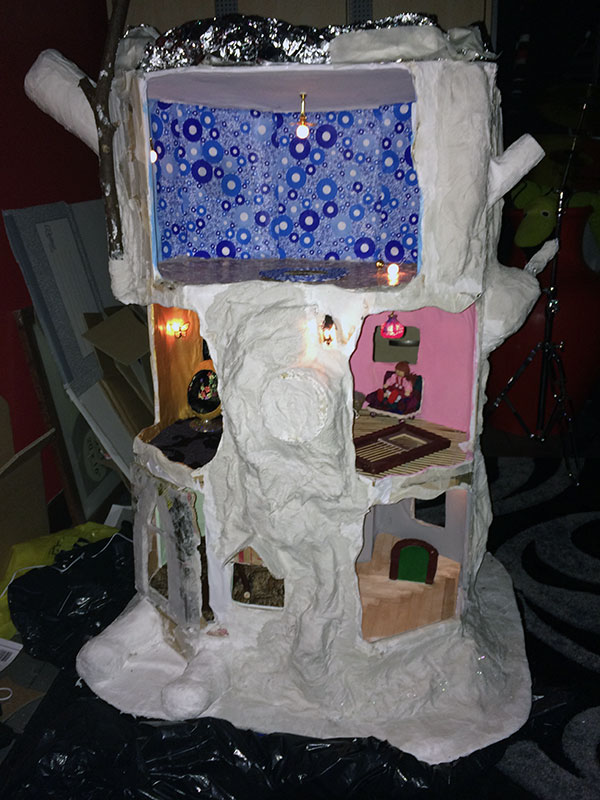
I was extremely happy with how the top floor turned out. This room will be Moonface's room, so I wanted it to have a round theme throughout. I therefore decided to make the floor out of polished pennies. I found the quickest way to do this was simply to leave all the pennies soaking in coca cola for about an hour. When I drained them they came out sparkling clean - easy peasy. I then used a hot glue gun to stick them all down, and grouted them afterwards. I think the effect works really well.
The other rooms all have different floors, ranging from carpet to table mats and a wooden lolly stick floor.
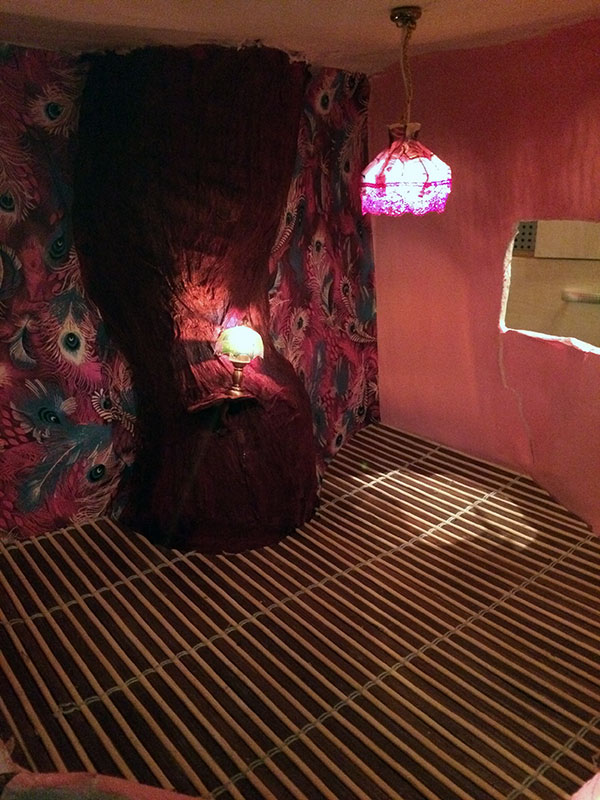
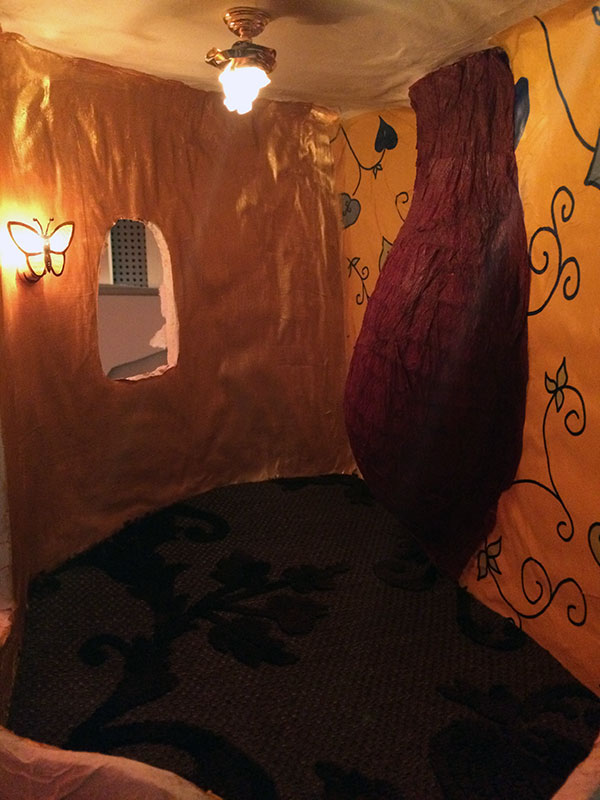
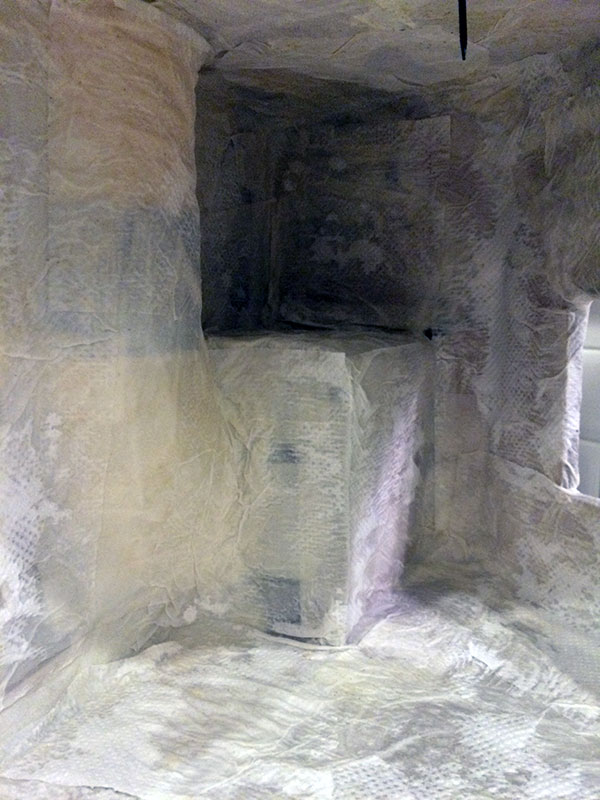
Next I covered the whole of the outside of the tree. This was done with either a mixture of pulped papier mache (my old favourite - I prefer to use kitchen paper) or my new found friend which is ModRoc. Wow, how much have I fallen in love with this stuff! I had never heard of it until it popped up on a website that I buy glue and paints from. I thought I would try it out and found that it worked perfectly for quickly setting some of the branches in place, and I also used it across the base to make it more solid.
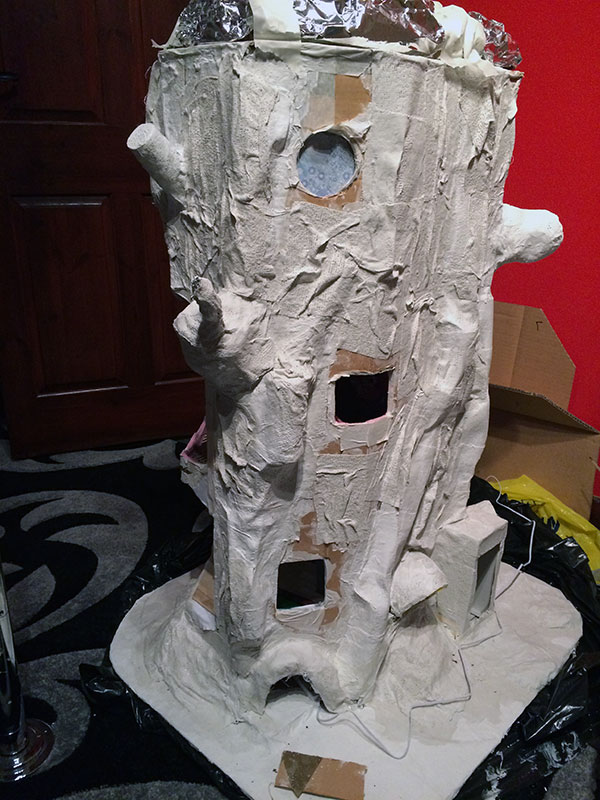
If you look, you will see I have covered over empty toilet roll tubes and all the wires for the lights. I thought this would be a good idea in case there was ever a wiring problem in the future, as the wires could be pulled through the tubes.
Once the papier mache and ModRoc and dried, I then covered the tree with brown crepe paper.
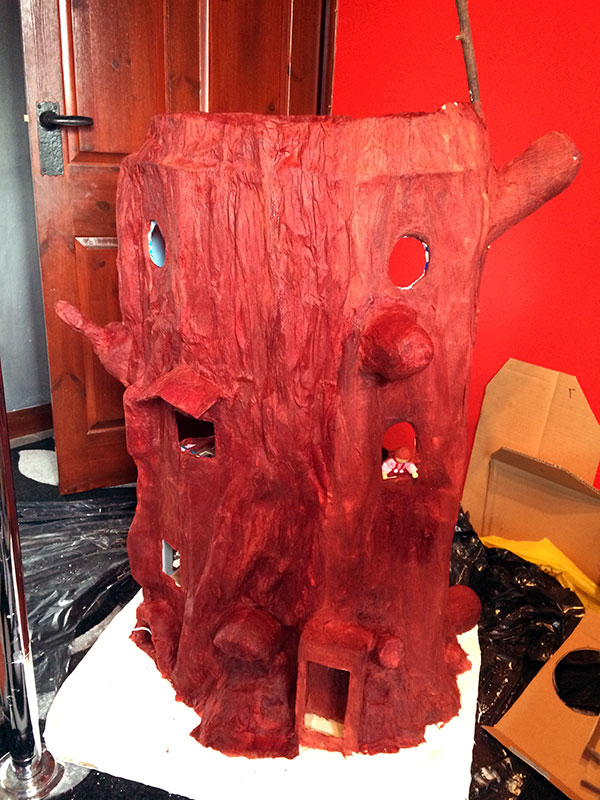
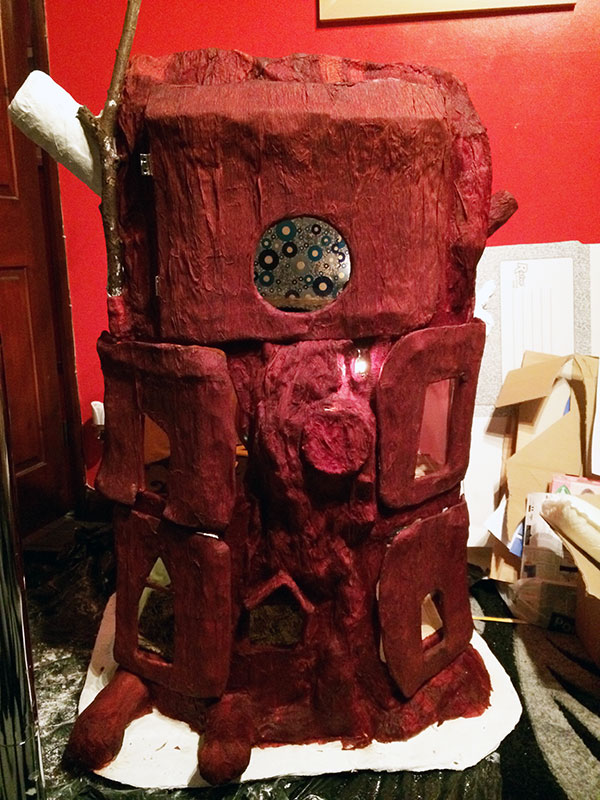
With the outside covered, I started thinking about the windows and doors. Firstly I had to make sure that the large opening outside doors still fitted. This was a little bit of a nightmare, and I had to add some ModRoc to them to make them larger. I had originally intended them to fit perfectly in the space, but then realised that it would make them very difficult to open. Please note that on the photo the doors are only balancing on the tree.
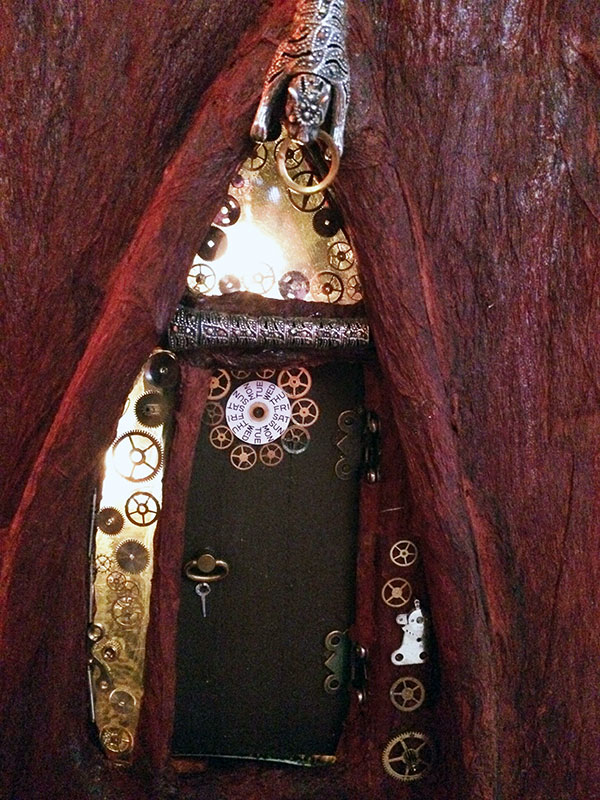
After attempting to make some wooden doors without success, I made some out of cardboard. For some reason I decided to give Watzisname and Saucepan Man a bit of a steam punk room. I know this does not fit in with book, but I thought that two men living together in 2015 needed a bit of a theme. I decided that with Saucepan Man being covered in pots and pans, that a few clock parts might work well.
I am not quite sure why I cut out their door shape in the way that I had originally, but now realised that it was going to be very difficult to fit in an opening door. So I made a decision to add a window to the side and above. This then meant that I could fit a door into the opening OK. I decorated the windows and door with parts from a couple of broken clocks and watches that I had. I used a broken watch strap at the top to make a large door knocker.
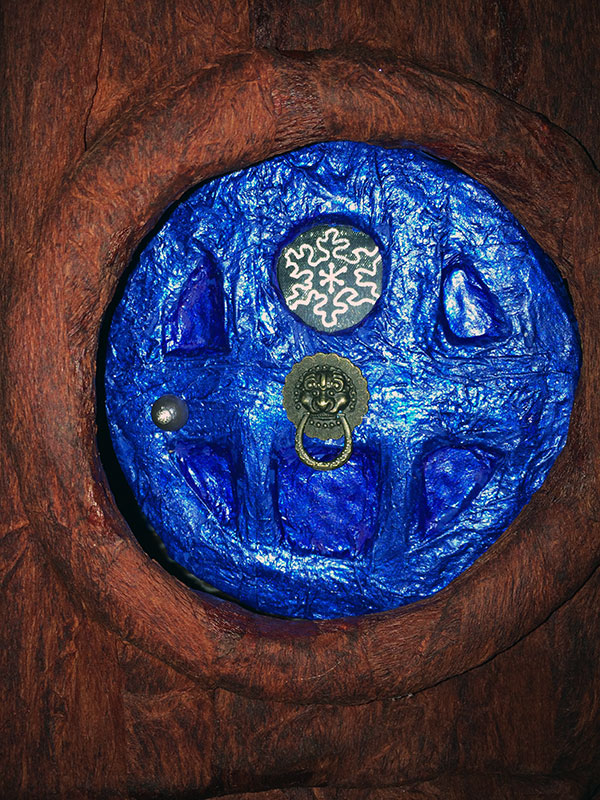
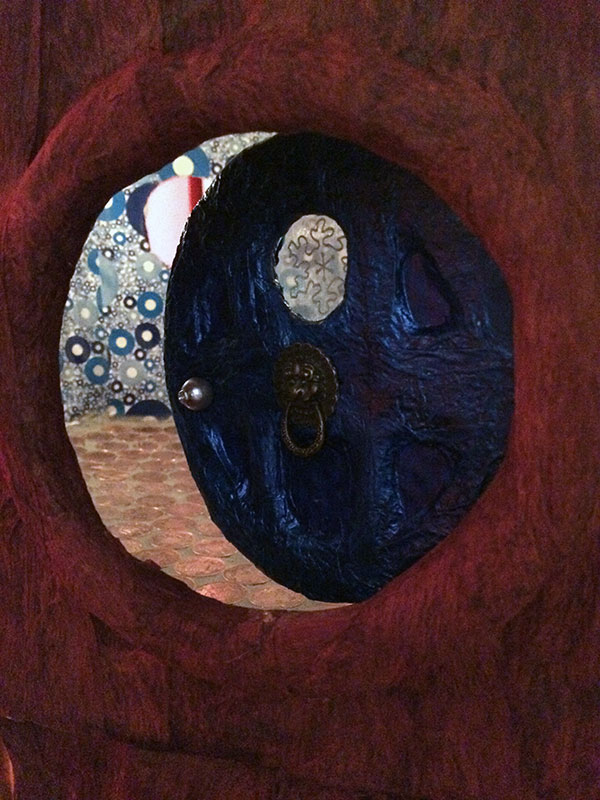
Moonface's door is made out of papier mache, painted blue.
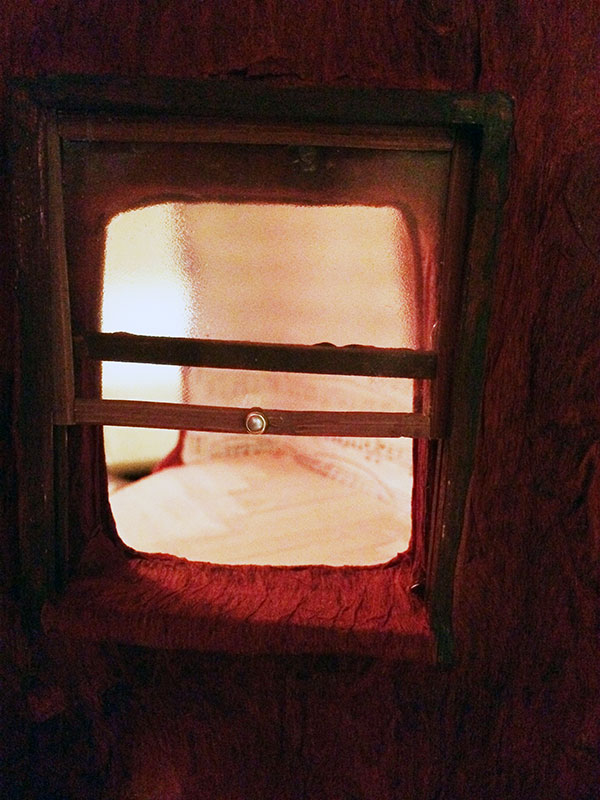
Onto the windows. Washalot's window needed to be a double opening one (so that she can throw water out of it). The windows are not perfectly square, but as I have found out with time, once papier mache and crepe paper is used to cover them, they will no longer be square. Plus I think it adds more character to the tree, not being perfect!
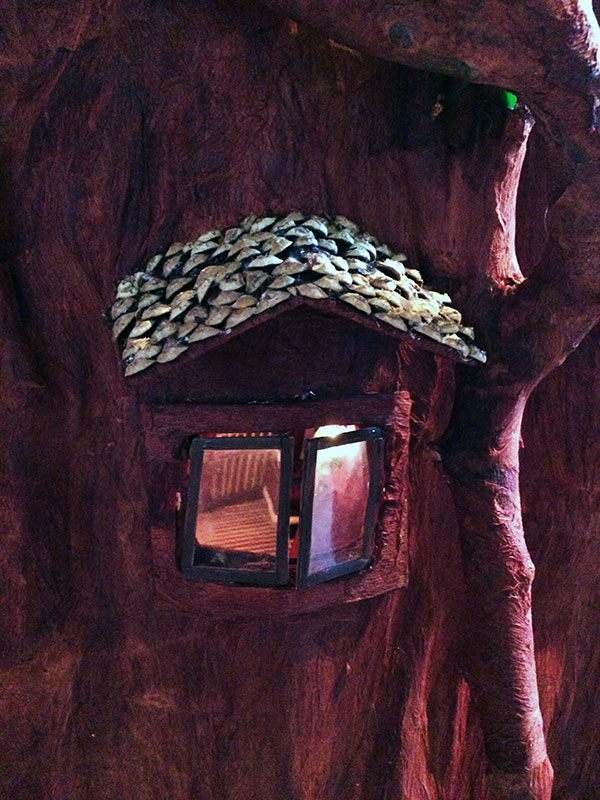
I covered the apex of the window with pine cones to give it a slate like appearance.
My next bright idea was to try and make a sliding/sash window. My husband said I was mad and taking things a little too far.... but I paid no attention to him and carried on with my mad idea.
This was to be Angry Pixie's window. I am also a little angry with myself for not taking any pictures of how I put this together! I started off making two balsa wood frames identical in size. I then stuck some matchsticks to outer edge of one of the frames. My logic was that this would create a small gap between the two frames to allow a window to slide in between. I placed the window in, then stuck the two frames together (being really careful not to get any glue on the window as well, otherwise it would not slide open). My idea actually worked! I was chuffed to bits and couldn't wait for it to dry so that I could show my husband I was not as mad as he thought I was. The Angry Pixie now has a window he can slam open and closed every time someone looks in his window.
I added a few branches to the back of the tree; mainly to make it look more like a tree, and also so that I can add some leaves to them. I wanted some branches to come up higher than the tree, so that I could add a little ladder at the top. (Only those of you that have read the book will know why the tree needs a ladder at the top)!
My tree was beginning to take shape, having finally finished all the windows and doors. Some of these have been a delight to make, whilst others have been an absolute nightmare.
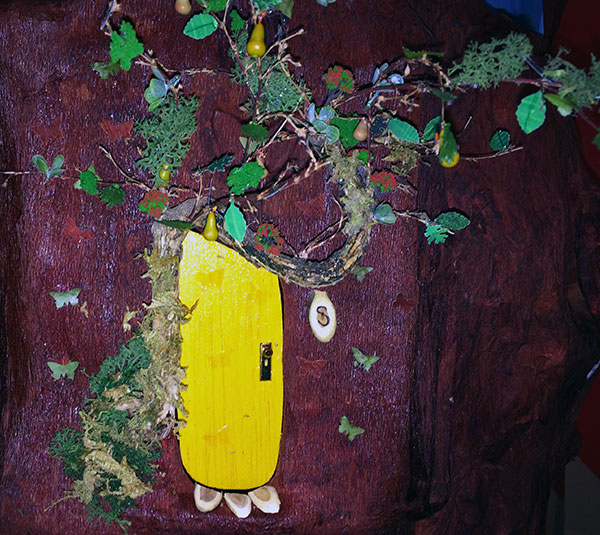
I had originally made Silky's door out of fimo a few weeks previously, but when I came to fitting it I ran into big problems. Firstly, the door frame broke, then trying to make another frame to fit the odd shaped door was just terrible. So I decided to scrap the whole original idea and start again.
My new idea came when my husband's beloved bonsai tree died. He was very upset about this, but all I could see was a little dead tree that I could use.
I set about making a door out of balsa wood, which was very much easier than I thought it would be. This was then painted yellow which is what the book says it is. I decided that Silky's room would have a butterfly theme (mainly because one of her wall lights is a butterfly). I attached the dead bonsai to the outside using a hot glue gun, then added some leaves to it. I had printed a page of different coloured leaves, grass and moss onto an A4 sheet. I then set about punching different leaf shapes out using two different paper punches. I had also bought some small plastic leaves used for flower decorating, plus a few little handmade pears that I found on eBay. I spent several hours trying to stick all these to the branches of the bonsai. I found that the hot glue gun worked the best and held everything on very well.
I finished the whole thing off by adding some fake moss up the side of the tree and a little brass handle to either side of the door. Finally, a small wooden 'S' outside. Oh, and I forgot...some little leaf butterflies around the door. I am quite pleased how this turned out and I think this is definitely my favourite door.

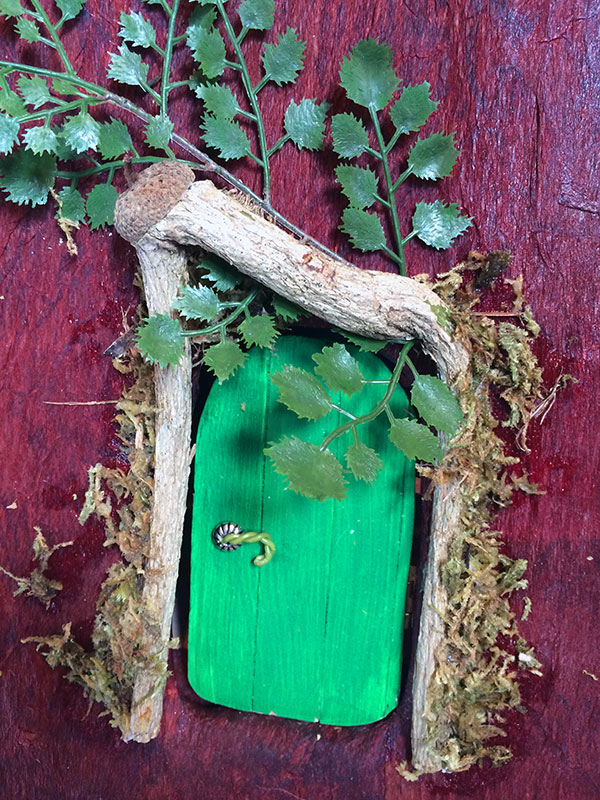
My final door is the Angry Pixie's. I had again made the door a few weeks earlier, but had not decided on the frame for it. I did not want anything too fancy for him, so made my decision to go for something a little rustic. Being as I had already painted his door green, I thought I would use some leaves on his door, but to make it blend in a bit. I used an odd shaped branch that I had collected from the park to surround the door to make the doorframe, and stuck some artificial leaves behind it. I made his door handle out of a bead and a twisted piece of garden wire. A final touch of garden moss around the branch and it was finished.
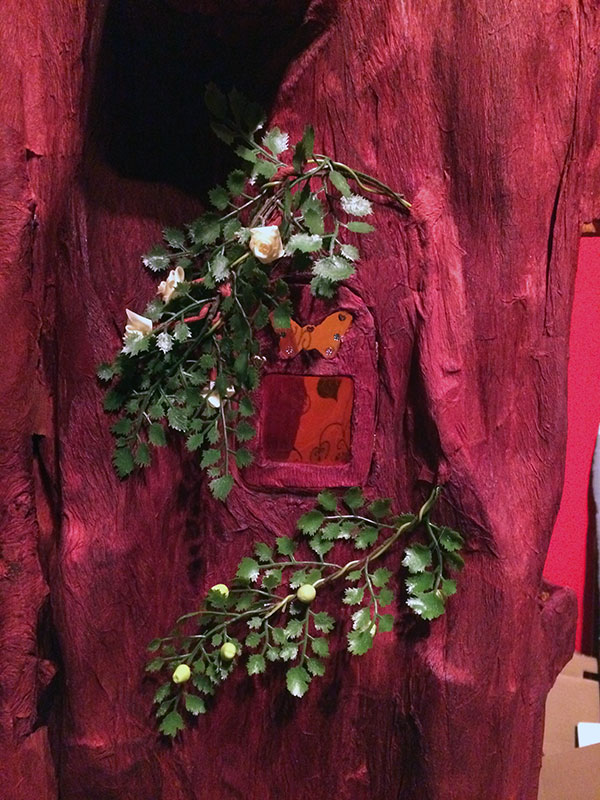
It was then back to sort out Silky's window. This was to be an arched window, but I was unsure of the exact design.
I seemed to spend an awful lot of time staring at the whole tree some days and not getting anything done, because I simply didn't know what I was about to do next. I think even if I had drawn up plans, these would have been put in the bin. Maybe part of my relaxation of doing this tree is not knowing what comes next?
As it was Silky's window, and after the door I had made, I decided to make some sort of butterfly stained glass window. The window frame itself is made out of cardboard. I traced out a butterfly shape at the top of it. I used some coloured plastic sheet as the glass, and decorated the butterfly with a few beads used for nail decorating. I again used fake leaves to surround the window and attached a few apples and small roses to the branches.
For all of you that have not read the book, the Magic Faraway Tree grew different fruit all over the tree, which is why Silky has pears at her front door and apples around her window. (I just thought I should clarify that I have not made a mistake).
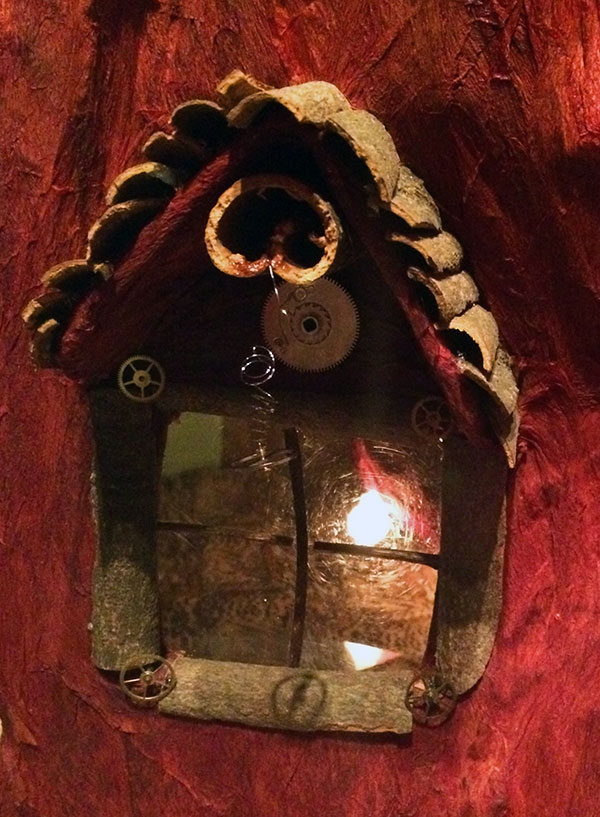
My final window is Mr. Watzisnames & Saucepan Mans'. The theme of their room is steampunk, and as I had already made their door using bits of broken clocks and watches, I thought I should follow it through with their window.
After much struggling with my other windows and hinges to make them open, I made up my mind not to make this an opening window. I started off again with a cardboard frame and attached some cinnamon sticks to the outside. I attached a few cogs into the corners for decoration. I used some small twigs across the centre of the window to add some panels. I then covered the apex over their window in cinnamon sticks, and added a spring and gears out of another watch. Not only does this window look good, but it also smells good enough to eat!
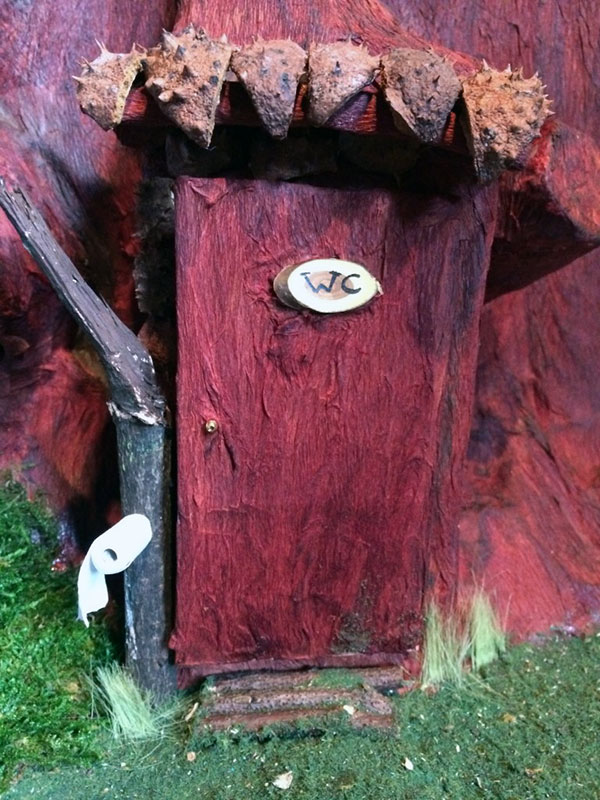
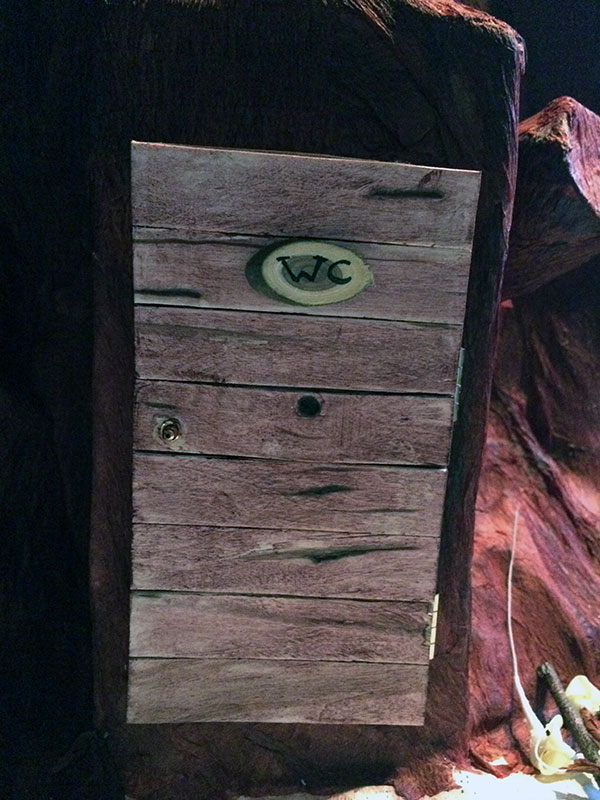
When I first started building the tree, someone asked me where the bathroom was. Now I hadn't really thought about this, so I added a small box at the back of the tree. I originally made the door out of wooden lolly sticks, but then decided they stood out and looked odd, so I used my old faithful crepe paper and covered over the sticks. This has given the door a more realistic look which matches in with the rest of the tree.
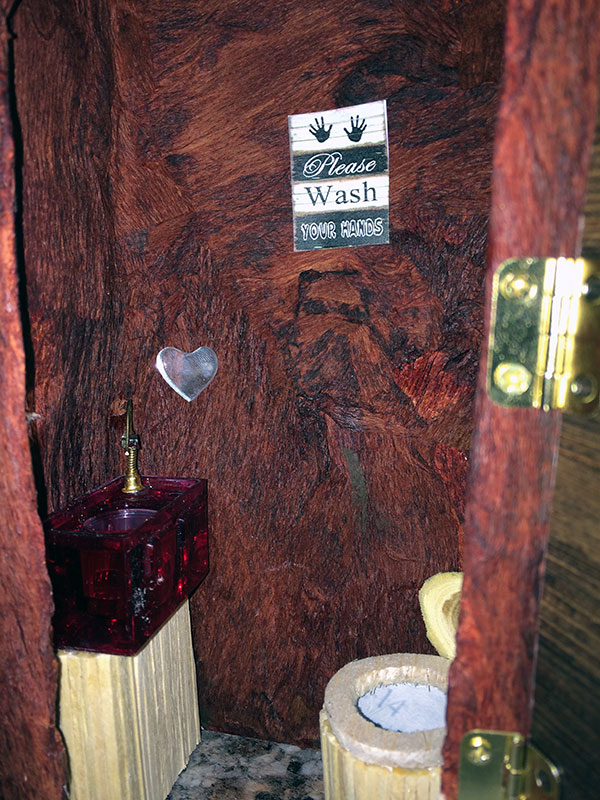
The toilet is made from a cardboard tube. I covered the outside in matchsticks, cut a balsa wood toilet seat and used a bark circle as the lid. The sink is made from a lid off a small perfume bottle. This had been placed on top of a matchbox, again covered in matchsticks. The tap is made from an old earring.
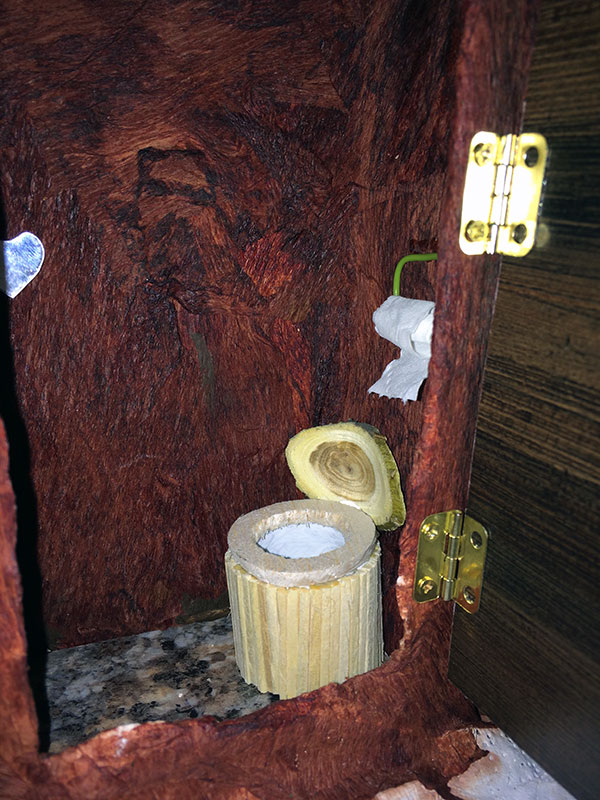
After the crepe paper had dried on the floor, I noticed that it had made the wooden lolly sticks warp, which I was gutted about. However, I did not want to remake the door , so I added some conker shells to the outside frame and made them hang over. This has covered up that the door doesn't fit correctly! I also glued on a twig outside (with a spare toilet roll on); this also helps to hide the warped door.
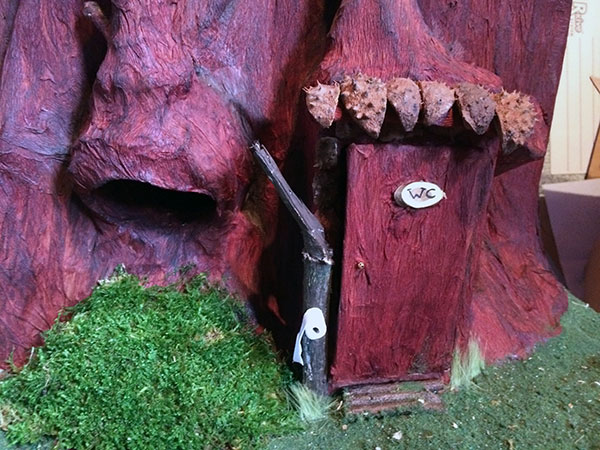
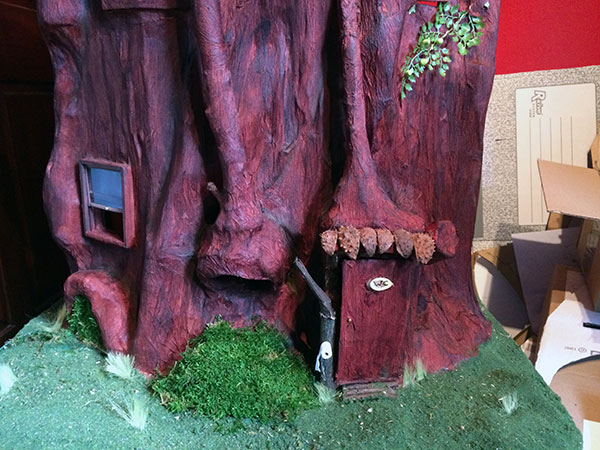
Also, if you noticed, I have covered the outside with grass. I am pleased with how this has turned out. I also used moss to cover over the bottom of the slippery slip (which is where the children pop out of the slide that runs through the inside of the tree). The moss came in very useful to fill in the hole where the electrics go. I have just placed it over the hole, which means it can be removed at any time to get to the electrics.