Mix up a small amount of pulp. Use this to mould the torso and shell bra. Leave to dry.
Layer newspaper around the string, in two sections, to create an upper and lower arm. Papier mache strips around the plasticine hands. Note: With the hands make sure that the papier mache covers both the plasticine and the base of the string at the join, this prevents the hands detatching. If unsure of the joint add a spot of glue to the join.
Screw the eyelet into the base of the head, approximately where the neck joint would sit, use a small spot of super glue on the screw to secure it in the papier mache. Sew the eye hole to the stocking/papier mache neck joint using the linen thread.
Sand down the pulp and then layer white tissue paper on human part of the torso and coloured tissue on the fish section. Continue to layer tissue paper until the marionette looks smooth and there is no trace of newsprint showing through.
A word of caution here, be prepared for dyed hands at this stage as coloured tissue leaks terribly. If you don't fancy being green/blue etc fingered then use white over the entire piece and use paint for the finish.
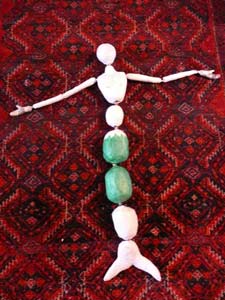
- Completing the torso

When the tissue layers are complete and totally dry, paint the finished marionette to suit. It is also sensible to varnish at this stage. The figure will drape neatly over a coat hanger by the joints allowing you to varnish easily.
Make the hair by sewing together wool. I do this by winding the wool around a book and then sewing the strands together before cutting off the book. The hair here was made in three pieces and then glued on along the seam in rows; one at the top of the head allowing for the fringe and the other two further back and towards the nape.
When all the decorations are complete but prior to stringing, snip the elastic bands from the joints. Be very careful not to snip into the stocking. If you leave them they will eventually perish and fall away, but will be unsightly.
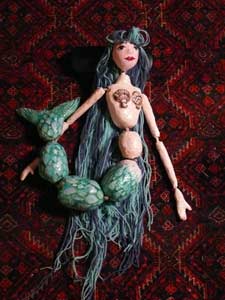
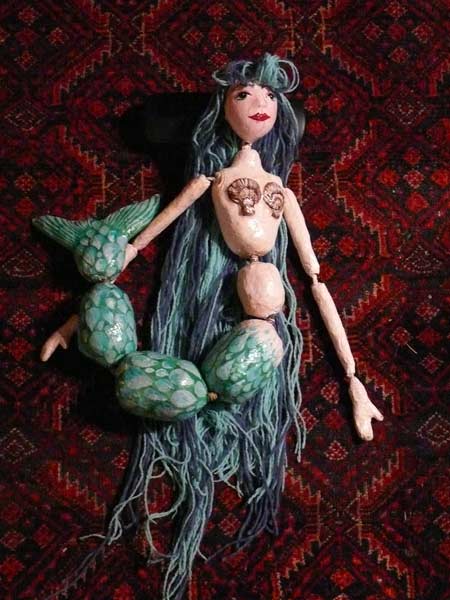
- Completing the mermaid
Finally drill a hole in each of the hands, screw another eyelet into the top of the head and another into the base of the tail.
Make a t-bar (I used lolly sticks glued together) and string the hands to the outer arms of the T. String the head to the centre of the T between the hand strings and string the tail to the base of the T.
It helps to have a helper here as getting the length of the strings right requires the marionette being held in the position it should hold when at rest.