Step Two - Layering paper
Brush your plasticine mould with a thin even coat of liquid soap to prevent the papier mache from sticking to it.
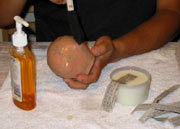
- Coating the mould
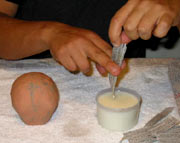
- Coating the strips
Dip the newspaper layers inside your paste. Let the fibres really soak up the paste. Use your fingers to thoroughly drain the paste from the paper strip. Don't worry if the paper appears dry.
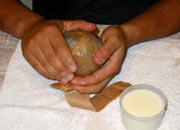
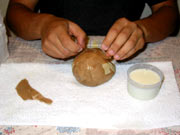
Apply the paper strips to the mould. It will stick to the mould instantly.
Overlap the paper strips, smoothing with your fingers, as you apply them. This makes sure there are no air bubbles trapped between layers. Use as many pieces of paper as you need until the mould is evenly covered.
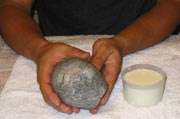
- Covering the ball with the strips
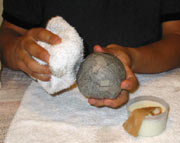
- Removing excess paste
Remove any excess paste with an old towel or kitchen rag.
Continue by applying alternate layers of newspaper and brown paper until you have four even layers of paper covering your mould. It is OK to apply all layers at the same time. There is no need to let each layer dry in between. Remove any excess paste with a dry rag or towel after each layer. Let the papier mache covered mould dry over plastic for a day or two. It will dry faster in a well-ventilated place, especially some place sunny, like a window. Rotate it often so it gets even circulation.
- Covering the ball
- Removing the mould
Step Three - Removing the mould
When the papier mache skull is completely dry, draw a line around the center of it. Following the line, cut around the skull using a very sharp scalpel or craft knife.
With your fingers, divide the skull into two sections. Remove the Styrofoam ball and the plasticine from the papier mache. Use a modeling tool or a plastic spoon if necessary.
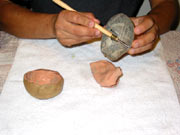
- Cutting the mould
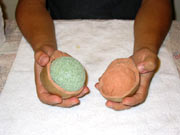
- Joining the hollow shells
You should get two hollow shells that retain the shape of the plasticine mould.
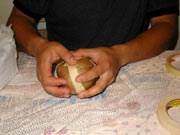
Join the two shells together with small amounts of glue. Apply masking tape over the seams.
Apply three layers of pasted paper over the masking tape seams.
Let your skull dry and it will be ready to decorate!
- Covering the seams