Introduction
The key materials are brown paper, an armature and a quick-drying glue.
The paper I prefer is a long-fiber, wood-pulp type that is fairly thick and has good tensile strength. This kind of paper is often used for market bags or wrapping parcels for mailing. My favorite glue is "Mod Podge", a water-based, acrylic glue used for decoupage. This glue dries in minutes, and remains clear and slightly flexible when dry.
For this demonstration project, I use an empty hen's eggshell for the armature.
You Will Need:
- Brown paper
- Newspaper
- Thin cardboard
- Quick drying glue
- Eggshell
- Sharp scissors
The Armature
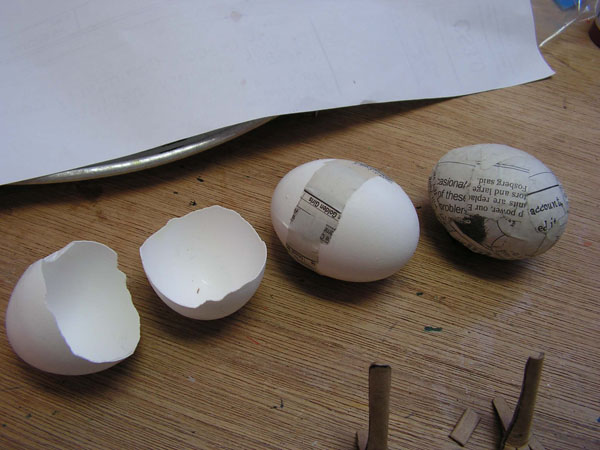
The eggshell is easily glued back together, and the shell is made stronger with several layers of newsprint laminated with the same acrylic glue. This provides a strong base, so that other layers of laminated paper can be added, eventually building up a very sturdy, lightweight, structure.
Creating a Pattern
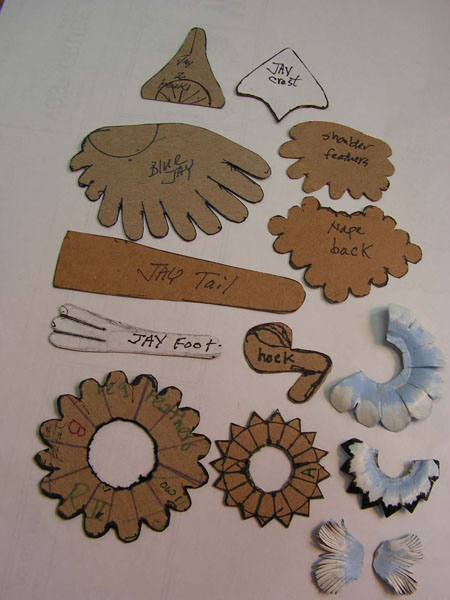
This is the pattern for the bird I constructed for this tutorial. I create patterns piece-by-piece for each new project. I draw the form, and cut a sample piece from a single sheet of heavy paper. If it appears to fit the structure I'm creating, I then reproduce the form in thin cardboard to use as a cutting template. What you see above are the cutting templates for most of the parts of "Happy Jay".
This particular construction process requires multiple layers of laminated, glued paper, applied in a certain order. It is a bit like building an onion, you must work from the center out to the final layers. Each new layer must be formed to fit the layer before while the material is still damp, so it is a slow process of several days for each piece.
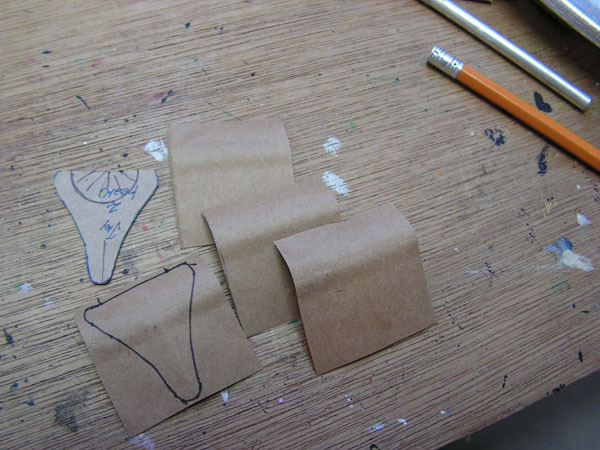
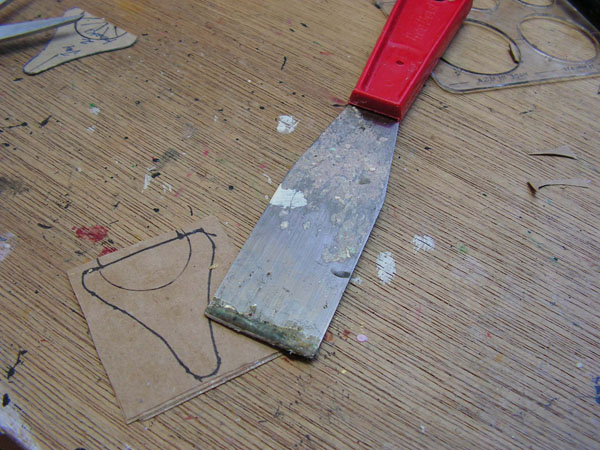
In the image above, four sheet of paper are cut to size for a beak section and the outline of the beak has been traced onto the top sheet.
For a beak, or other free-standing element, I would use 4 or 5 layers of paper. For an element like the "nape" I use 3 layers since it will be supported by other pieces. Legs and feet were constructed from 6 layers of paper to be strong enough to bear the weight of the completed bird.
It is best to start with small projects till you become accustomed to the speed that the glue dries. Once dry, the glued paper is not flexible enough to be bent and formed into curves to fit earlier layers.
Building a Layer
5 layers of paper have been laminated with glue, and the bubbles have been squeezed out of the piece by scraping with the putty knife. The pattern has been traced on to the final layer (before gluing), so there is no delay in cutting and shaping the form. (So the glue doesn't dry before you are ready).
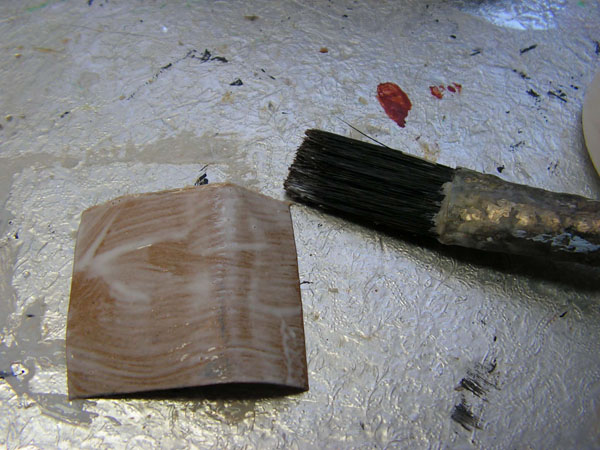
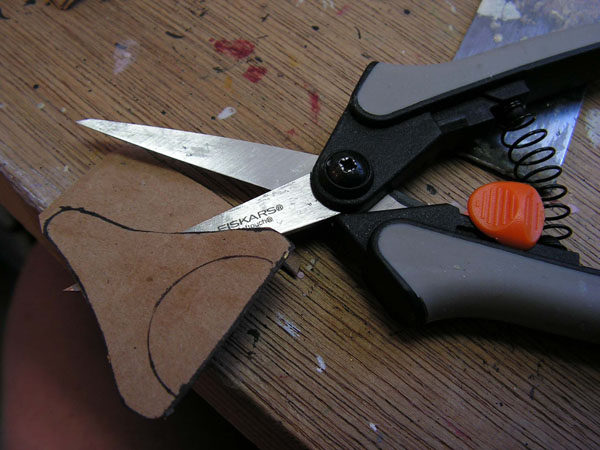
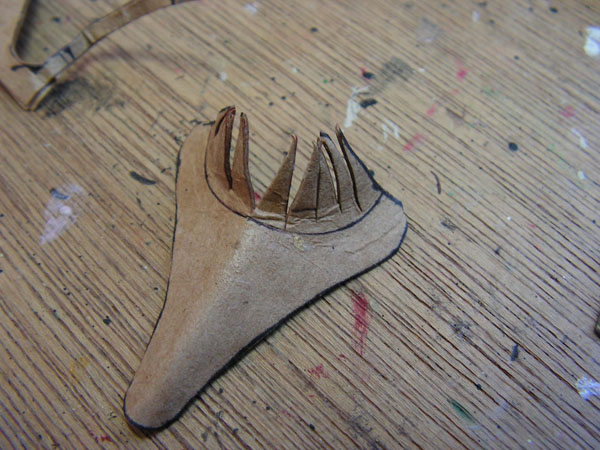
I have a very sharp, precision scissors that I use to quickly cut out the pattern piece. Because the egg is round, you must snip a "pie" design into the beak to ease the 2-dimensional piece to fit the egg curve. As soon as I have bent the still-damp beak piece to fit the egg, I use the same glue to attach it to the curve.
Forming and Adding Elements
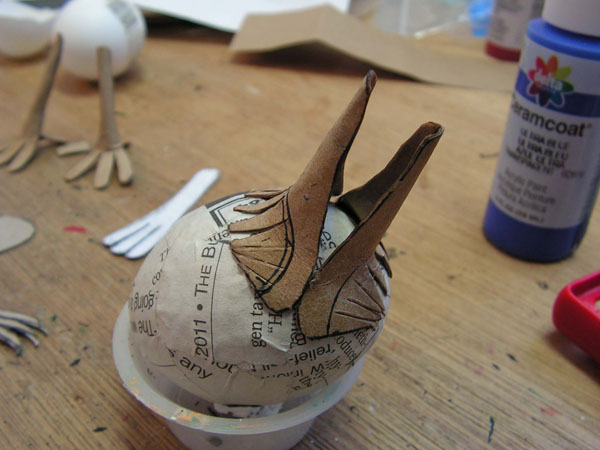
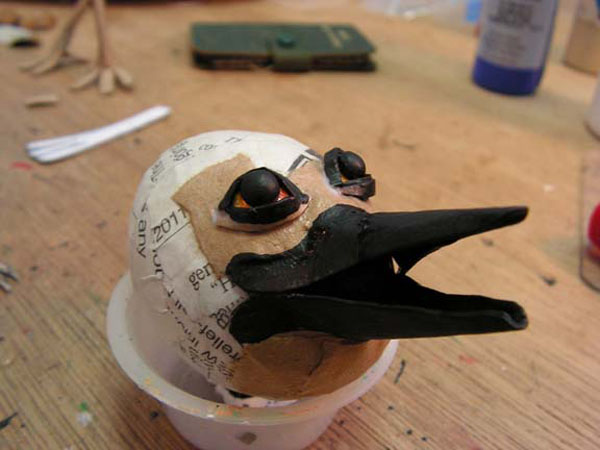
The upper and lower beak pieces have been added, and small, torn bits of paper have been brushed with glue and will be used to secure the beak to the egg.
The next task is adding the eyes to create the expression of the face. Once the eyes are in place, the front panel of the "crest" should be added. Like the beak, the crest is cut from laminated sheets of glued paper and bent into a curve to fit the egg while the glue is still damp. The eyes of this bird are constructed of split-pea halves, with eyelids of applied strips of cartonnage scrap.
Paper is a fiber product, like cloth. When wet with glue, the fibers expand and the paper is flexible, even somewhat stretchy, and can be gently pulled and pressed with the fingertips into 3-dimensional curves and forms. The beak, crest, wings and feather layers shown in these images have all be formed in this manner. Extreme curves may require "pie" cuts to allow the paper to bend.