Introduction
Lynne O'Brien makes fabulous animals based on the olde worlde toys of yesteryear, using moulds. Here she takes you through the steps to make your own olde worlde bunny to get you acquainted with the procedures. Lynne also describes what can go wrong and how to put it right.
You will need...
- Papier Mache pulp
- Clear plastic mould
- Mould release (e.g. vegetable oil)
- Exacto or other sharp knife for trimming the edges and for some light carving
- Acrylic paints
- Elmers glue (or equivalent)
- Glass glitter (optional)
Notes:
For a project such as this one, a clear plastic mould is ideal. For larger projects, a heavier guage plastic mould should be used. Plastic moulds are better than metal, which tend to rust.
Alternatively, you can make your own mould using silicone mould compound. Using an antique mould, cast a clean figure in it. Then use this cast to make a mould, following the manufacturer’s instructions.
You should use the pulp mixture of your choice – see Getting Started tutorial. Alternatively, you may prefer to use Celluclay.
Let's get started
- Beginning the rabbit
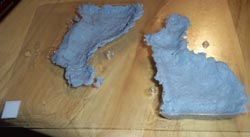
Apply your release agent to the moulds. Press in the pulp to line the insides. The great thing about using clear plastic is that you can tilt it to the light to make sure that you haven’t missed any areas. I always leave a little lip on the edge to ease removal when it is dry. The papier mache will dry very well if left in front of an electric fan overnight.
As you can see in these pictures, the vegetable oil that was applied as a release agent prior to filling with pulp, has enabled the two halves of the rabbit to be removed easily and cleanly. You can now wash the moulds and use them over and over again.
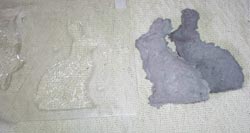
- Removing the rabbit
- Neatening up
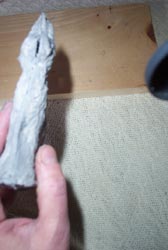
Here you will see that I have trimmed the edges with an exacto knife. I have included this picture because you will also notice that I have broken an ear! I wanted to show you what can happen…..but we are papier mache artists, and though tricky, we can fix this! I put some papier mache around the inside of one of the dry cavities and will match up the other side as best I can, smoothing the edges with my finger. In doing this, you must be careful not to get too much on detail like the eyes. Leave to dry thoroughly.
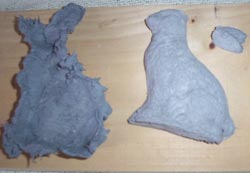
Here you can see the two halves joined together. There are gaps but don’t worry about these. Leave to dry and then simply smooth in some more pulp along the join.
- Joining the two halves
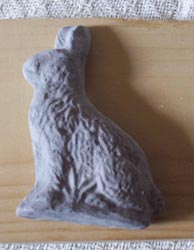
- Ready for decoration
Here is a bunny all ready for sanding and some light trimming with exacto knife. (Use great care with exacto, they are very sharp!) Sand the edges carefully so as not to remove too much detail, then paint with acrylic paint however you like. The rabbits of old, much like snowmen and santas, were often decorated with glass glitter everywhere but the eye area. If you want this look, paint on elmers or equivalent glue that dries clear. Holding the item over a plate, sprinkle on the glitter, tap off the excess and allow to dry.
Finished example

- Finished example
I hope you enjoyed this tutorial and have fun making your own Olde Worlde Bunnies. Don’t forget that you can make your own moulds. Some fine craft stores stock mould making compounds, such as silicone, and if you have a cherished old antique rabbit mould that might rust, create a cast with sculpey or similar material and create your own mould.
-
(please visit my website.)