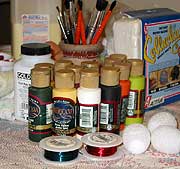
You will need...
- 1 inch Styrofoam eggs
- Instant papier mache mix
- Sand paper
- Decorative wire
- Wire cutters
- Acrylic paints in a variety of colors
- Ultra fine glitter (black, clear, orange, red)
- Fine bristle brushes
- Acrylic medium
- Modeling tools
- Old tablecloth or sheet
- Cleaning rags
- You will need...

- Making the mix
Let's go!
Cover your working table with an old tablecloth or sheet. Mix the papier mache mix according to the package directions. Knead until you get a soft pulp. You can also use your favorite papier mache pulp recipe.
Flatten the end of the styrofoam eggs or balls with your finger. Make sure they can stand on the table without rolling.
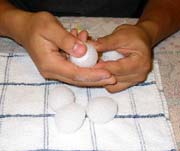
- Flattening the ends of the styrofoam eggs
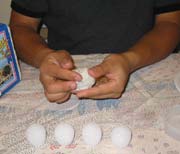
- Covering the styrofoam
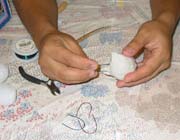
Cover the styrofoam balls with a thin layer of papier mache pulp. Add more pulp to add details. Keep your fingers wet, so the pulp doesn't stick to your them.
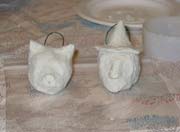
Create halloween characters (cats, witches, devils, pumpkins, skeletons) by pinching and pulling the papier mache pulp. Add small amounts of pulp to create noses and ears. Use modeling tools to create the pumpkin's indentations, eyes and mouths. If you don't have modeling tools you can use a plastic knife or the end of a brush.
Don't worry if your ornaments are not too detailed. A lot of their personality will come out during painting.
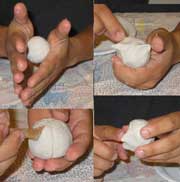
- Modelling your creations
- Making a handle
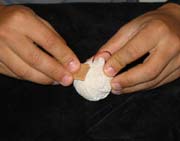
Cut a one inch section of decorative wire (I use green and red 20 guage wire from Artistic Wire, LTD) and bend it in to a "U" shape. Cut the wire at an angle so it is sharper. Insert it into the styrofoam ball to create a handle.
Let your ornaments dry over a piece of plastic or hang them up by their handles. Let them dry completely before the next step.
- Drying your ornaments
- Sanding your ornaments
Sand your ornaments lightly with a small piece of sand paper.