Working with the egg.
Well, you've prepared it. What now? Let your imagination work. I will just outline some techniques.
1. Whole shell.
This can be the fundamental structure; a strong, light shape as an internal armature or the main shape of the artefact. You can build on it with pulp.
2. Part shell.
If you saw across the whole shell, you can create a huge number of different convex and concave shapes, which can be used as armatures, as additions to armatures, or as moulds.
3. Extensions.
Because the shell is so light, by inserting tubes, wires etc. you can extend the structure out into the space around.
Giving it weight.
With sand.
It may be that you want your egg to be heavy. In that case, a solution would be to cut it in half width way. Put dry sand in the bottom section and enclose it with a paper layer. Join the halves together and Bob's your uncle, as they say.
An alternative is to stand the bottom section at an angle before you drop in the sand. Set it in position and the egg will always balance to the offset position.
With plaster.
Basically, there is no need to do this at all. I have done it, but that was to strengthen a shell which I intended to paint decoratively (butterflies, flowers and things). Two points. One is that you don't FILL an emptied egg shell with plaster. The heat generated and the expansion will crack the shell. Just fill it about a third full.
The second point is about filling. I defy anyone to try to pour liquid plaster into the egg, unless the egg has a large hole. It is easier to have two holes, one top one bottom. Have the plaster reasonably fluid. Put one end of the egg in the plaster, your lips to the other and suck. You know if you've filled it because you get a mouthful so remember - only about a third! Once the plaster is in, dry and seal the bottom hole. Hold it between two fingers and rotate it to coat the inside of the shell as evenly as you can.
Over to you!
It's over to you now guys. Please let me know if you can think of improvements as well as ideas for using the eggs.
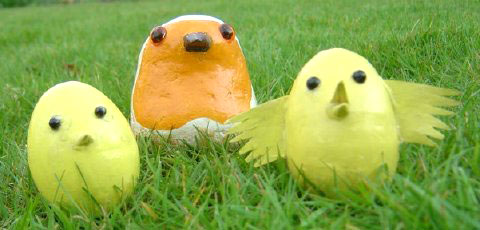
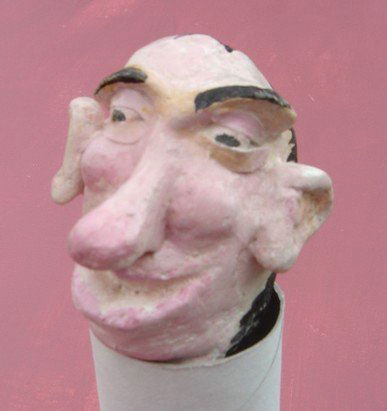
Below are some examples of papier mache items that have been made using eggs.
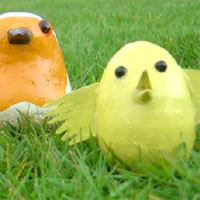
- Egg birds
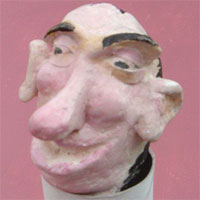
- Egg face

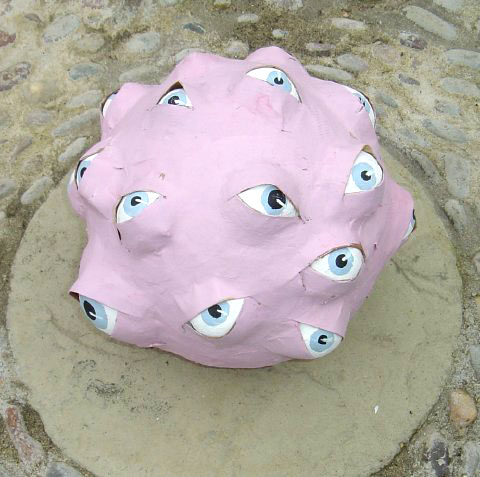
- Egg eyes

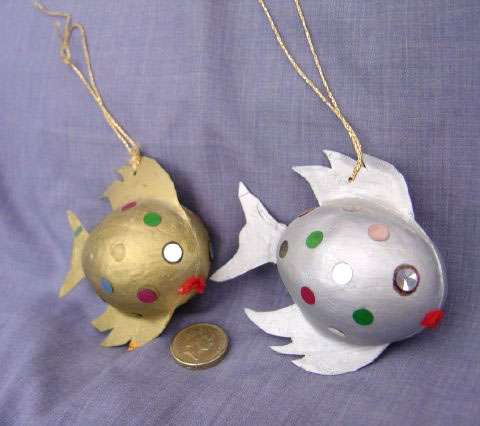
- Egg fish
Using egg shell as a filler
Added 19th February, 2007
If was "Butterbee" who raised the idea (on December 28th, 2006) that egg shells were a good source of calcium and that you could dry them in your oven and grind the shells up into a powder for a cheap source of calcium. Perhaps it could be a substitute for buying ground chalk. A nice example of waste not want not.
Sue (catperson) discovered that Wikipedia says that bird eggshells are 95% calcium carbonate with a little bit of protein to hold the CC together. She thought that if you could powder them fine enough, it ought to work.
I tried this and it didn't work as well as I hoped. You must, of course, remove the inner membrane, which is probably easiest when the shell is still fresh. I dried the pieces and then ground them for some time with a pestel and mortar. It might be that electric grinders would make it finer but I doubt whether the blade would last too long with that abrasion.

- Ground chalk and egg
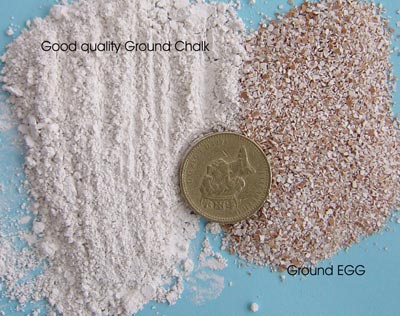
The result was that the ground eggshell was like coarse sand. It will work as a filler with pulp but gives a roughness so would be unsuitable for really fine work.
Fishy1 has suggested that a ball mill might reduce it to a fine powder but no-one as yet has explained what a ball mill is!
Even if it is coarser than ground chalk, egg shell makes an interesting filler. The surface can be sanded in the normal way and gives the appearance of a conglomerate, or granite. If you just want to leave the untarnished surface with only a varnish coating, this might suit your needs. If you are going to paint it, there is little point in going to the effort of grinding.
Love to y'all
DavidO
(dopapier)